Validating is a way of preventing the incorrect entry of data. It can also produce warning screens and error messages to give information to users entering the data.
Example 1
You wish to have a column in a worksheet that displays the date in the format of 28 June 2018. You can use the formatting options from previous posts to achieve the end result however this will only work if the data being entered is entered in some form of date format i.e. 28/6/18. To enforce entry correctly the field must be validated to only accept that type of entry.
In the steps below we will set the field to only allow the date format above.
Step 1 – Set to desired format
Follow the steps on the previous blog posts in order to set date format or custom date format
Step 2 – Setting Validation
Apply to single or multiple cells by ensuring they are selected/highlighted first.
- Select the Data Tab
- Click on the Data Validation drop down list
- Select Data Validation
From the Data Validation window
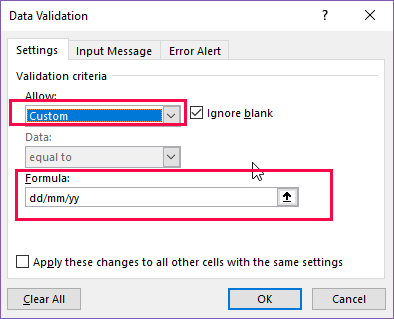
- Select Settings tab
- Click on the drop down list for Allow values
- Select your desired option (in our example we will use Custom so we can type in how the date format must be entered)
- If date was chosen it will be based on specific dates that either match, are between, less than, more than etc. as per the Data drop down list.
- Type in the Formula for the format as per previous posts.
If you now do not enter the data in the correct way then you will receive an automatic message explaining that it does not match.
Step 3 – Input Message (optional)
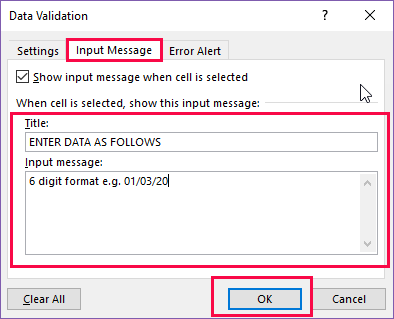
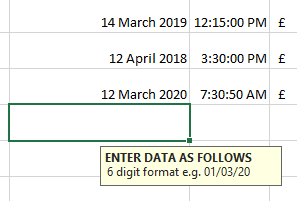
Input messages allow you to define a message to appear as soon as the cell is selected. This can be used to inform users how you want text to be entered.
- Select Data Validation as before
- Click on Input Message tab
- Enter a title and an input message
- Click OK to confirm
Step 4 – Error Alert
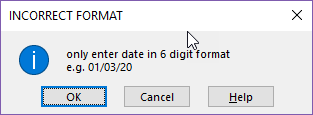
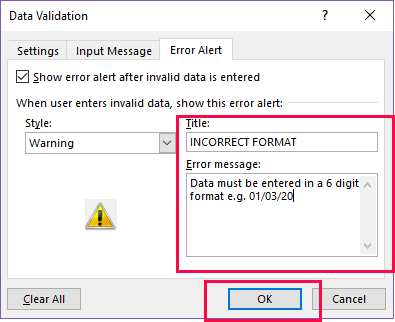
You can also set validation so that an error Alert appears should the data be entered in the incorrect way. This can be done alongside the input message or instead of.
- From Data Validation
- Select Error Alert tab
- Choose the image style you would like to use
Information – will produce the error message but the data will still enter even if incorrect.
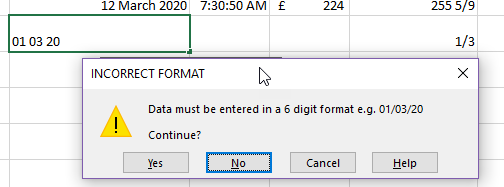
Warning – Will produce the error message and give the user the option to continue or re-enter correctly.
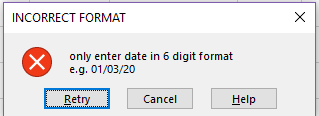
Stop – will not allow data entered in any other format other than that specified.
- Type in the Title for the error
- Type in the error message to be displayed.
Any type of field can have validation applied and options will vary depending on what format of data you wish to input initially. Above we have used only a custom date example but there are many variations. Have a go!!!
If you would like any specialised training for any area of Excel please get in touch with the training team at Fusion to discuss.
Sharon Brook – IT Training Manager – 01484 500767 – [email protected]


